The Clients page of the wizard allows you to select all the Clients that will be attached to the Account, and assign the Role that they are assigned to, e.g. Borrower, Co-Borrower etc.
If the Wizard was opened via the Client page, the Client information will be automatically filled in.
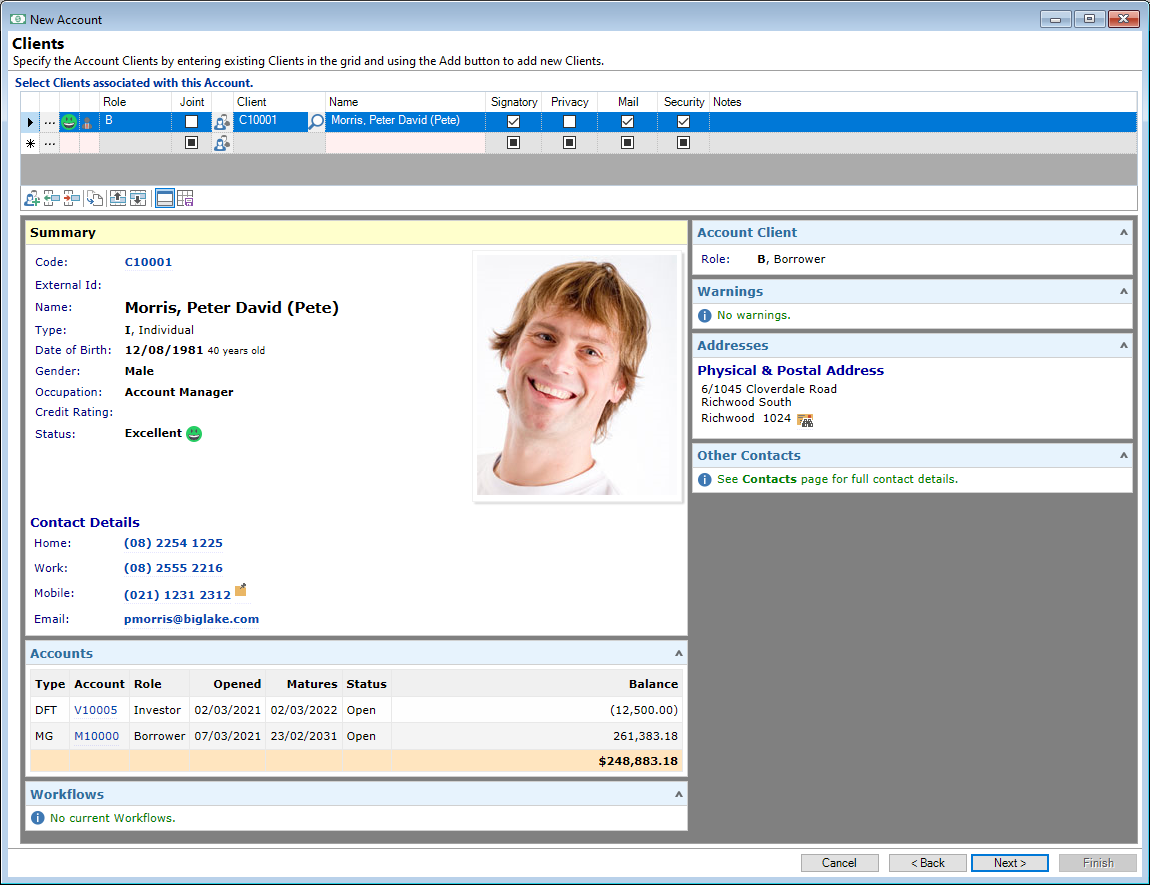
Select Clients associated with this Account
- Select the Client from the lookup
 icon, or click the 'Add a new Client record'
  button (found in the button strip), to Add a new client.
 - In the Role column, select from the dropdown the Account Role to be assigned to the Client, e.g. Borrower, Co-Borrower and Guarantor.
- Tick the following checkboxes where required:
You can paste in the Client Id by right mouse clicking and selecting the Name\Client Id.
If the Client is to be Joint on the Account, tick the Joint checkbox.
Signatory - tick if the Client is to be a signatory to the Account.
Privacy - tick if the Client has signed the Privacy Consent form.
Mail - tick if Documents are to use this flag. This means that if the checkbox is unticked, the Client will not receive emails.
Security - this option must be ticked for the Main client as their name will be selected as a Debtor listed on the Financing Statement.
Other Clients on the Account can be selected to also be listed as a Debtor listed on the Financing Statement.
Click the  button to move on to the next page of the New Account wizard.
The following information describes the other areas of the page and what is showing.
The Clients grid shows details of the Clients that have been added to this Account. As with most grids, you can adjust the columns to display only the information you wish to see.
Available columns are:
| Column | Description |
|---|---|
 | The Drilldown icon opens the Account Client form with the selected Client's details. |
| Account Role | The Description of the Account Role applied to this Client. |
| Account Role Icon | Displays the icon relating to the Account Role applied to this Client. |
| Addressee | The name as it is to appear in the address. |
| Client | Displays the Client Code. |
| Client Status Icon | Displays the icon relating to the Client Status. |
Drilldown Client -  | Opens the Client form with this Client's details. |
| External Id | The Code provided as an External Id. |
| Hide | If ticked, this Account will not be displayed in the Client, Accounts grid. |
| Insurer | The Code of the Insurance Company as specified on the Account, Details page. |
| Insurer Name | The Name of the Insurance Company as specified on the Account, Details page. |
| Joint | Shows whether the Client is a joint party to the Account. |
| If ticked, this Client will receive correspondence about this Account. | |
| Name | Displays the Client's Name. |
| Notes | Notes entered on the selected Client's details. |
| Policy Number | The insurance policy number as specified on the Account, Details page. |
| Policy Type | The insurance policy type as specified on the Account, Details page. |
| Role | The Code given to the Account Role applied to this Client. |
| Salutation | The name as it will appear at the top of correspondence. |
| Security | If ticked, this Client will be included as a Debtor when requiring a Security Statement. |
| Signatory | If ticked, this Client is a signatory to the Account. |
Button Strip
| Icon | Description |
|---|---|
| Add a new Client Record. |
 | Insert a row before the current row. |
 | Delete the selected row. |
 | Duplicate the currently selected Client to create a Joint Client. |
 | Move the current row up (Ctrl+Up). |
 | Move the current row down (Ctrl+Down). |
 | To show/hide the preview pane window. |
 | Save options as defaults. |
Preview Pane
The Preview Pane displays a HTML view of information and client detail based upon a Summary script.