To Customise Toolbars
Right click on the Toolbar (the white space or icon strip just below the menu bar) and select Customise.
Image.png)
 button, or customise an existing Toolbar by selecting it from the list of Toolbars on this form.
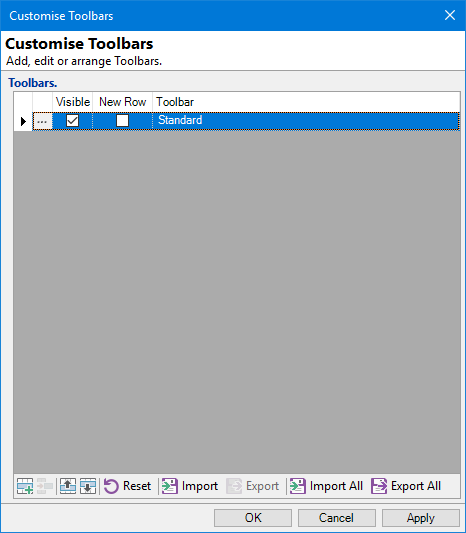
Toolbars
This is a read only view of all your Toolbars. You cannot change the settings on this form, you must open each Toolbar individually to change the settings for each one.
| Column | Description |
|---|---|
 | Drilldown to the selected Toolbar |
| Visible | Will be ticked if the Toolbar has been selected to be shown on the screen |
| New Row | Will be ticked if the Toolbar is set to show on a separate row, or unticked if it will appear on the same line as other Toolbars |
| Toolbar | Name of the selected Toolbar |
Button Strip
| Icon | Definition |
|---|---|
| Add a new Toolbar |
 | Delete selected row |
 | Move the current row up (Ctrl+Up) |
 | Move the current row up (Ctrl+Down) |
 | Click to reset all Toolbars to the default Items |
 | Import a single Toolbar from a file |
 | Export the selected Toolbar to a file |
| Import all Toolbars from a file |
| Export all Toolbars to a file |
Drilldown and the following form will then be displayed:
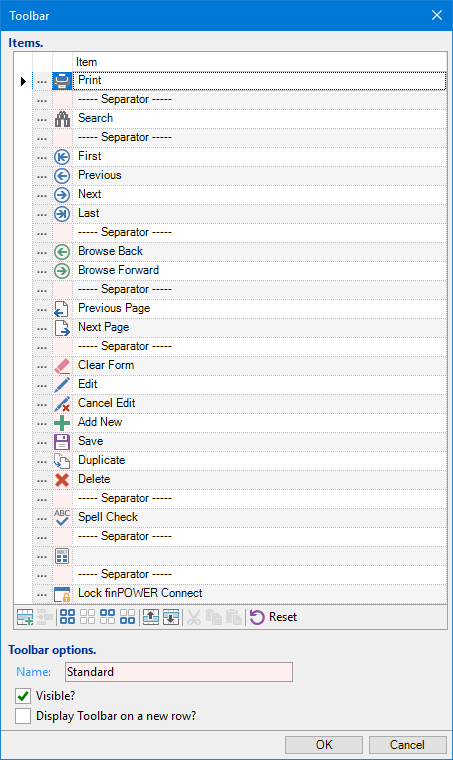
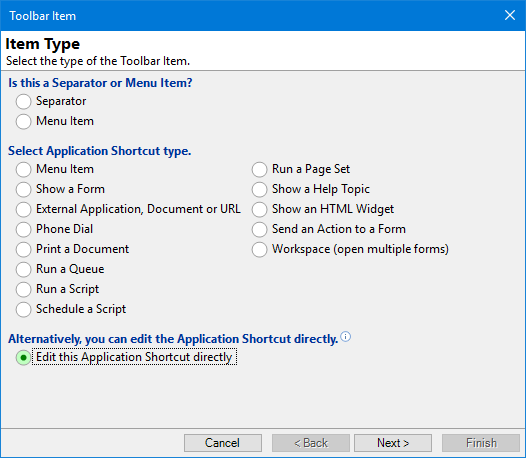
From here you can either replace items by drilling down and selecting a new option, or add a new item by clicking the button. This will bring up the Toolbar Item Wizard as shown below:
For further Customisations refer to the individual pages listed below:
- Toolbar Items Form
- Add Menu Item
- Add Show a Form
- Add Launch an External Application, Document or URL
- Add Phone Number to Dial
- Add Print a Document
- Add Run a Queue Command
- Add Run a Script Command
- Add Schedule a Script
- Add Run a Page Set
- Add Link to Show a Help Topic
- Add Show an HTML Widget
- Add Show a Portal
- Add Send an Action to a Form
- Add a Workspace