Clicking  Export button will open the Export Information wizard.
File Name
- Enter a format and name for the Export File.
- Do you want to embed Files and Documents in the Export File?
- Comments to include in the file.
- Click the
 button to move to the next page of the wizard.
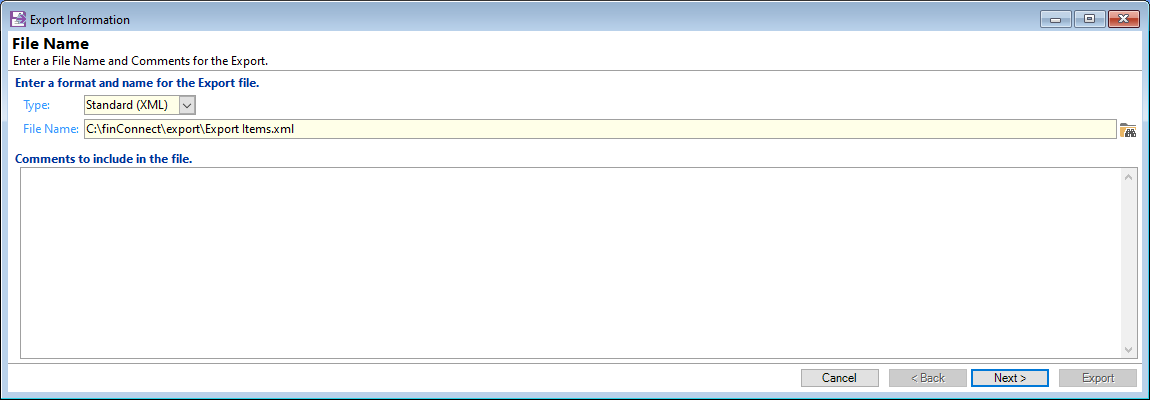
Select the Type, 'Standard (XML)' or 'CSV'. The majority of items will be exported as 'Standard (XML)', the only option available to export as a CSV type file, is the 'GL Accounts'.
File Name - click on the File Find button  to take you to the Windows Explorer so you can choose a location to save the file containing the Item/s.
Comments to include in the file - will be saved to the file and appear when you import the file to another finPOWER Connect database.
Re-exporting - If you select a file that has been saved previously, the system will remember the Parameters that were selected and ask you if you would like to use the same Export options.
For example, if you previously exported a Script via this process, and you use the 'File Find' button to select this file, then the following message will appear:
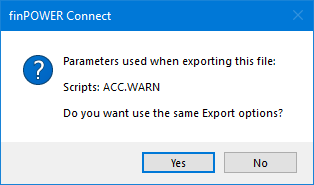
The advantage to using this process, is that you do not need to remember which options were exported.
Ticking this option will not currently do anything.
Add comments as required.
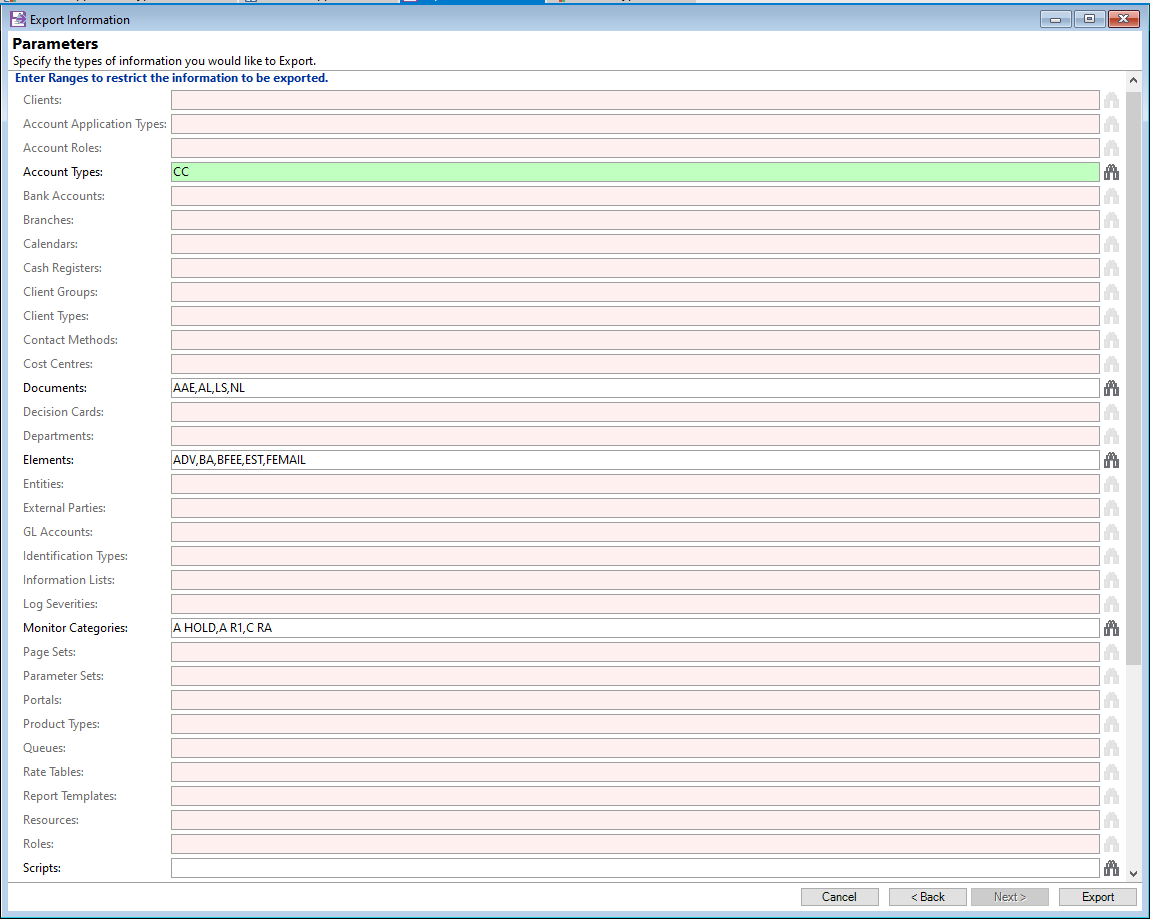
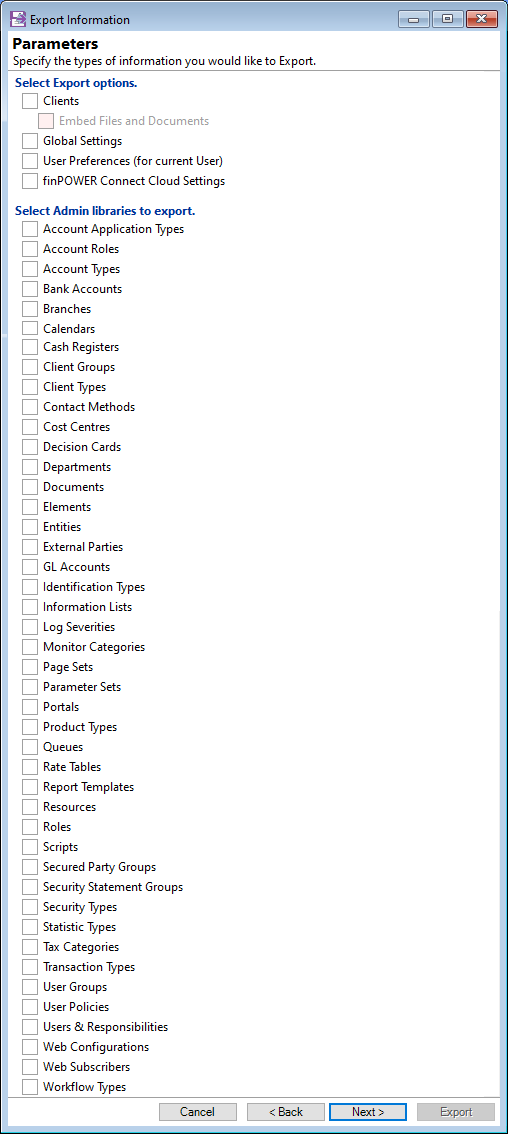
Parameters
- Select Export Options
- Clients
- Global Settings
- User Preferences - this is for the Current User only
- finPOWER Connect Cloud Settings.
- Select Admin libraries to export
- Click the button to move to the next page of the wizard.
Tick the checkboxes required to export the following:
Tick the checkboxes of each of the Admin Libraries you would like to Export.
Select the Particular Parameters to export
- Enter Ranges to restrict the information to be exported.
- Leave the field blank to select all to export, or click the
 button which will take you to a list of all the items available to choose. Click on each item to select it.
 - Click the
 button to export the selections to an XML file and complete the wizard.
The options ticked on the previous page will determine the fields available on this page of the wizard. For example, if you ticked 'Account Types', then this Range will be available to select.
Additionally, this page allows you to export all of the options selected or restrict to a range.