Clicking the  Import button will open the Import Information wizard.
Import Information
- Enter the format and name of the File to Import.
- General Import Options.
- Specify defaults and options for imported Clients.
- Click the
 button to import the file and complete the wizard.
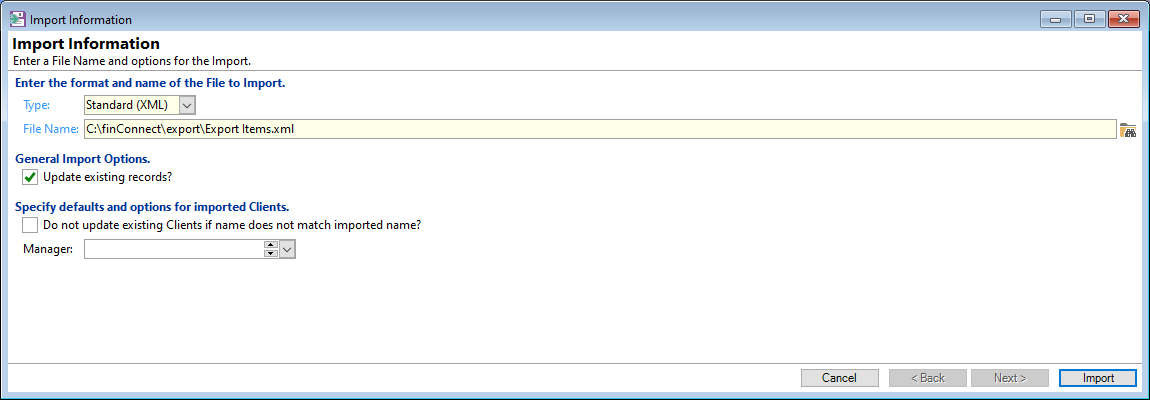
Select the Type, 'Standard (XML)' or 'CSV'. The majority of items will have been exported as 'Standard (XML)'; the only option available to export as a CSV type file, is the 'GL Accounts'. Therefore, if you are importing any file that is not exclusively 'GL Accounts' then select 'Standard (XML)'.
File Name - click on the File Find button  to take you to the Windows Explorer so you can choose the file to be imported.
Tick the 'Update existing records' checkbox to overwrite and update the records you are importing.
Tick the 'Do not update existing Clients if name does not match imported name' checkbox, if you want this option to occur.
The option to set a Manager against Clients being imported, is available by selecting the appropriate Name from dropdown list.
Any Comments added to the export file, will appear at this point.
Issues when Importing Files
- The Items being imported are not updated.
- Messages appear when attempting to import a file.
- User Defined Parameter Set 'PS.ACC'.
- Document 'ACS'.
- Monitor Category 'R1'
- Monitor Category 'RA'.
- Make sure all of these Items are set up in the Database or
- When exporting the Account Type, make sure these things are included with the Export file.
The 'Update existing records' checkbox is not ticked.
Where a file cannot be imported, messages will appear on the screen detailing the reason. Usually this happens when a complicated record type such as an 'Account Type' is exported without the sub-records, e.g. Documents, Elements and Scripts.
Please read the message and follow the information. For example, the following message shows that Account Type 'CC' could not be imported.
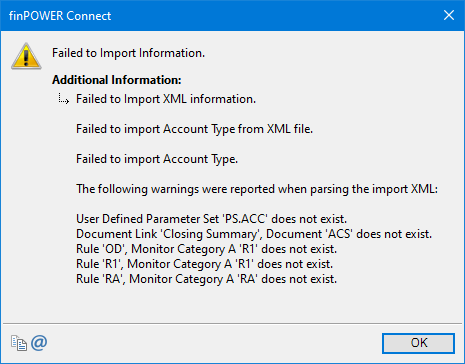
This message is stating that the following items do not exist in the database and are required:
To fix the above, either: