Overview
User Defined Permissions can be used to secure objects such as Scripts, Documents and Workflow Types.
How to set up User Defined Permissions
The example described below uses a User Defined Permission key for a Script.
- To set up a new User Defined Permission, click on the User Defined tab.
- Click on the Permissions tab and expand the UserDefined and Script folders to view the new Permission Key.
- Go to the Script or Document and click on the Permission Page.
- Click on the Users tab at the bottom of the page.
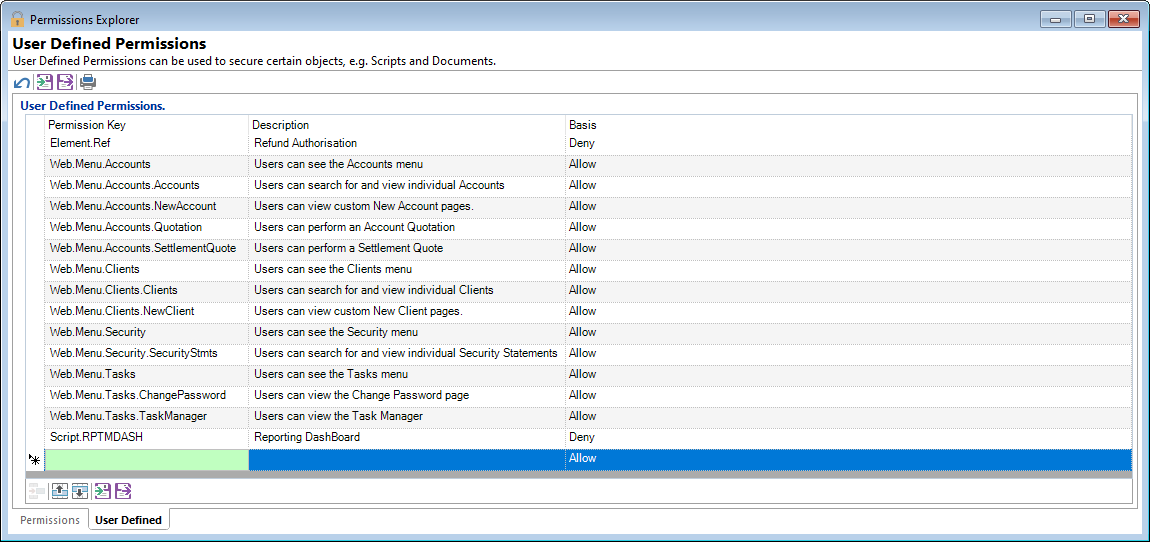
Click in a new line next to the 'star' and enter the name of the Permission key, i.e. Script.RPTMDASH. A sub-folder will be created for each dot that is included in the name, e.g. after SCRIPT.
Next add in a Description which tells you what the Permission key is for.
Set to Allow or Deny.
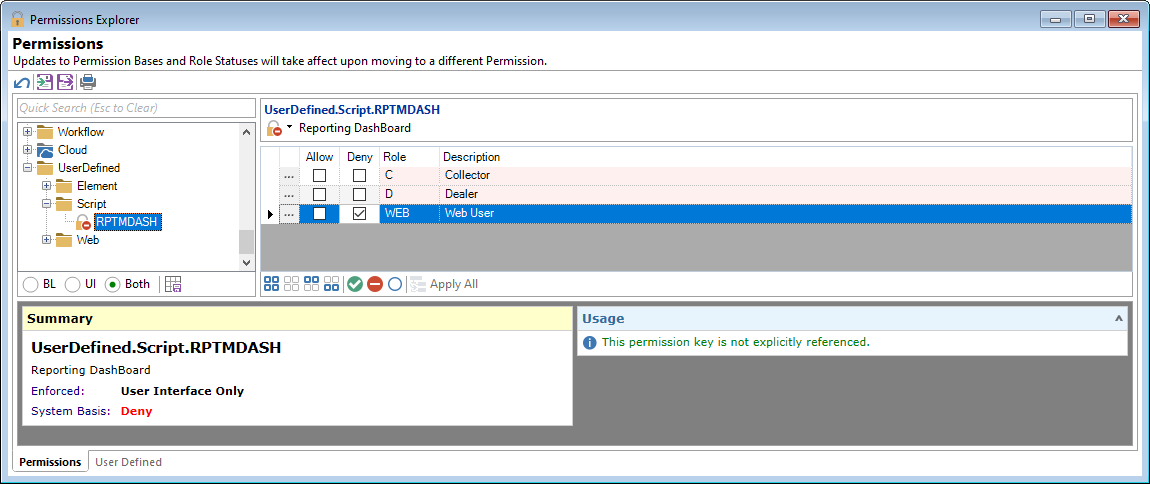
On the grid, set Deny and Allow permissions to roles. Click on the 'drilldown' and click on the Effective Permissions page to show the default settings.
Click here for more information on Role Overviews.
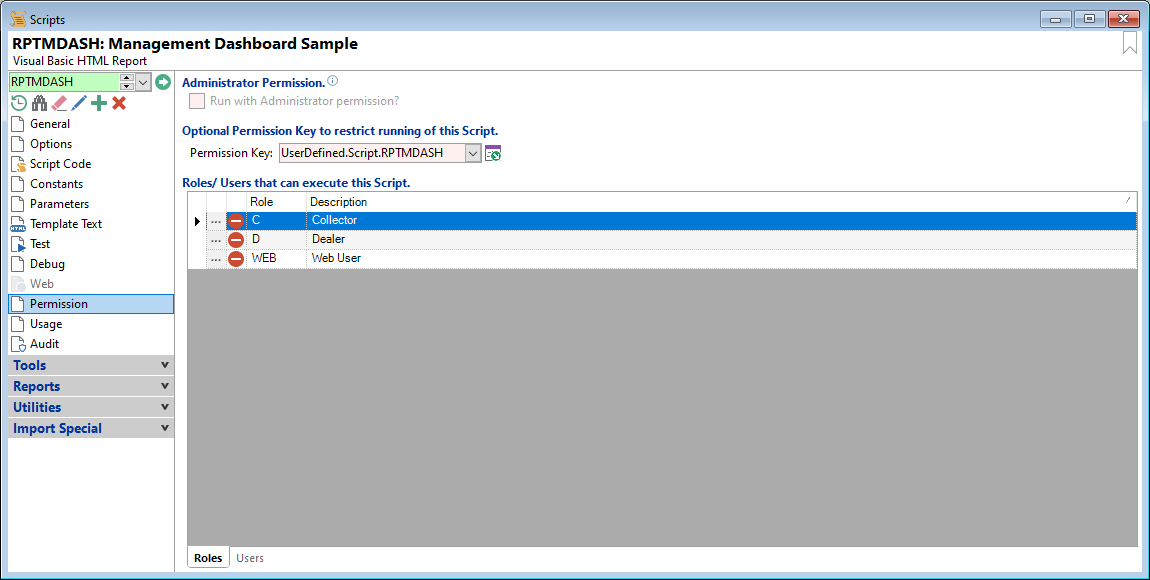
Add in the Permission Key that was created, making sure that it is prefixed with UserDefined, for example UserDefined.Script.RPTMDASH.
You should see that the Roles set as Allow or Deny on the 'Permissions Explorer' is mirrored here. Clicking on the 'drilldown' will take you back to the 'Permissions Explorer' to make any changes.
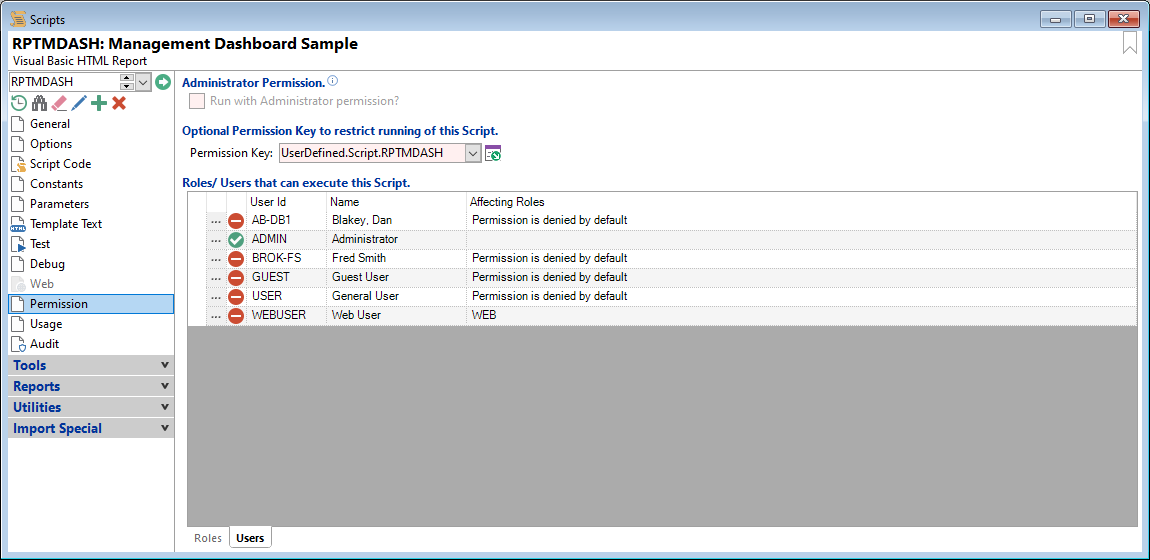
You should see that the Users set as Allow or Deny on the 'Permissions Explorer' is mirrored here. Clicking on the 'drilldown' will take you back to the 'Permissions Explorer' to make any changes.
Button Strip from Permissions Explorer
| Icon | Description |
|---|---|
 | Select all rows. |
 | Select no rows. |
 | Select all rows above and including the current row. |
 | Select all rows below and including the current row. |
 | Allow selected rows. |
 | Deny selected rows. |
 | Clear selected rows. |
 | Apply these Roles statuses to this and all sub Permissions. |