There are a number of Options available to select or unselect depending on how the Document is being used.
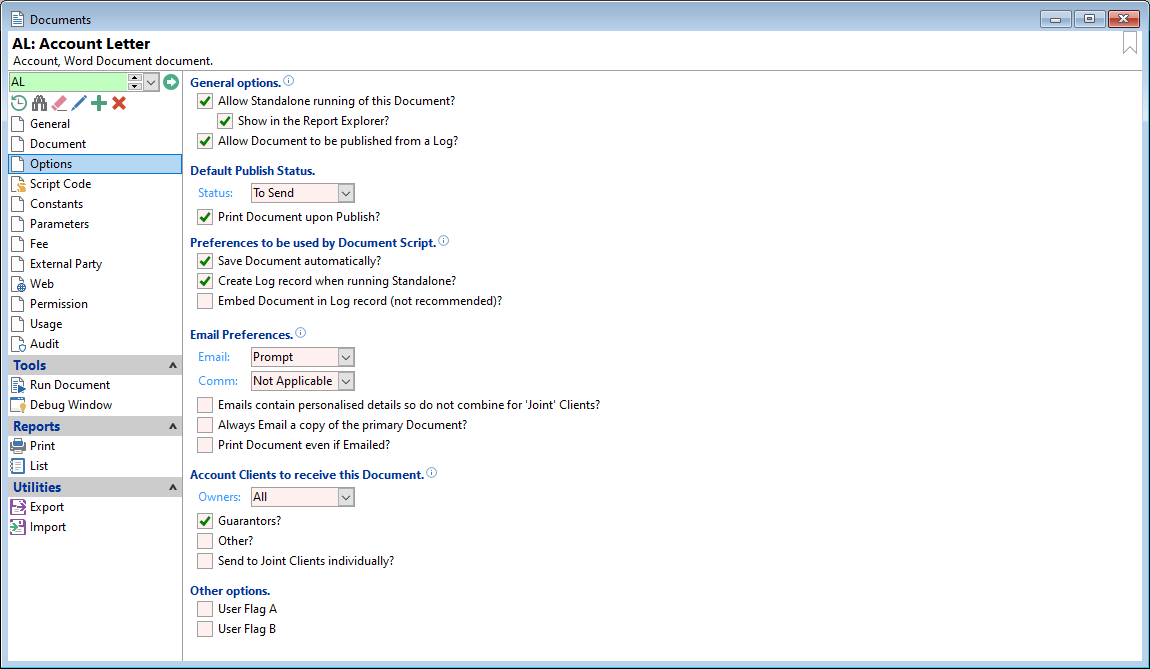
General Options
Tick the following checkboxes as required.
- Allow Standalone running of this Document
- Show in the Report Explorer
- Allow Document to be run from a Log
If ticked the Document can be run without first creating a Log record. For example, it can be set up to include a range of Client Id's and send a letter to each of them. It also allows the Document to be run from the  Run Unlisted button in the Report Explorer, Document section.
If ticked the Document will show in the Documents grid under the appropriate Document Type sub heading, e.g. Account Documents Report Explorer. 'Allow Standalone running of this Document?' must already be ticked for this option to be available.
If ticked the Document can be generated from a Log record, e.g. a Client Log.
Default Publish Status
- Status - Default the publish status to one of the following:
- To Send - ready to be published, or
- Open - cannot be published until it is updated to, 'To Send'.
- Tick the Print Document upon Publish checkbox so that the document will be ready to Print.
Preferences to be used by Document Script
The following preferences can be used by the Document Script. It is up to the Script to implement this functionality.
The 'Email' option does allow the finPOWER Connect User Interface to indicate (or prompt) whether a Document is to be Emailed but it is still up to the Script to Implement this.
Tick the following options as required:
- Save Document automatically - the Document Template or Script can be modified to Save the Document automatically.
- Create Log record - the Document Template or Script can be modified to Create a Log record automatically.
- Embed Document in Log record (not recommended) - by ticking this option the Document will be embedded in to the Log record, however we do not recommend using this option as it is liable to 'bloat' the database.
Email Preferences
If Emailing a copy of the primary Document, all Emails will reference the first Document created, even if a different copy of the Document is attached to the Log for printing purposes.
Email and Comm
Select from the drop down lists, the following options as required:
- Email - select whether the system is to do one of the following:
- Prompt - the system will ask you whether you want to go ahead. Do not use this option if the document is being sent as part of another process, e.g. an automatic item in a Workflow.
- Yes - will send the email straight away.
- No - will not send an email.
- Comm - These options correspond to the settings found on the Client, Profile page, under Communication settings. Select the option required.
Tick the checkboxes for the following settings
- Emails contain personalised details so do not combine for 'Joint' Clients.
- Always Email a copy of the primary Document.
- Print Document even if Emailed.
Account Clients to receive this Document
These options can be used by a Document Template or Script and it is up to the Document Template or Script to implement this functionality if required.
For Email and SMS type Documents, sending the document to anything other than the Main Account Client may result in multiple logs being generated and multiple fees being charged.
- Owners - select from the dropdown list the appropriate option for your document.
Tick the following relevant checkboxes.
- Guarantors - If ticked the Document Template or Script can be modified so that Guarantors will receive this document.
- Other - If ticked the Document Template or Script can be modified so that Other Clients linked to the Account will receive this document.
- Send to Joint Clients individually - If ticked the Document Template or Script can be modified so that the document will be sent to Joint Clients individually.
Other Options
User Flag A and User Flag B are used in Document Templates, Scripts or external applications.
These User Flags can be renamed by going to Global Settings, Documents, General page and adding in new names to the fields.