Credit Bureau Defaults can be managed via the Account Form through the Account Credit Bureau History Grid and the Account Credit Bureau Default Wizard via the Status Page including the different fields available and the functions of the Button Strip located at the bottom of the grid.
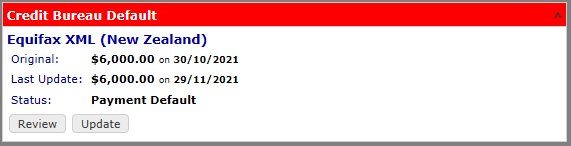
The Action Buttons in the Summary Page will differ depending on whether there is a currently loaded default or not.
- If no default is currently loaded, the buttons that will show will be:
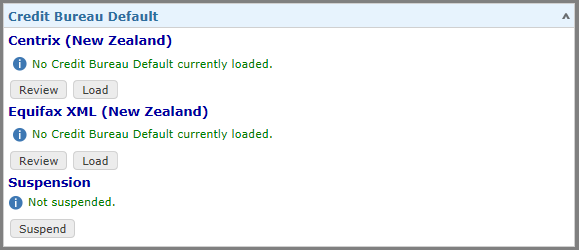
- If there are defaults loaded, the following buttons will be available:
- If there is a Suspension in place, a Clear button will be visible.

Clear
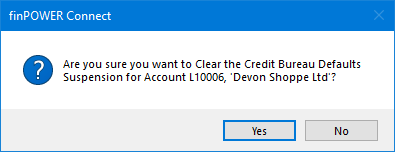
In order to clear the Suspension, click Clear.
You will receive an alert requesting confirmation, select Yes to proceed.
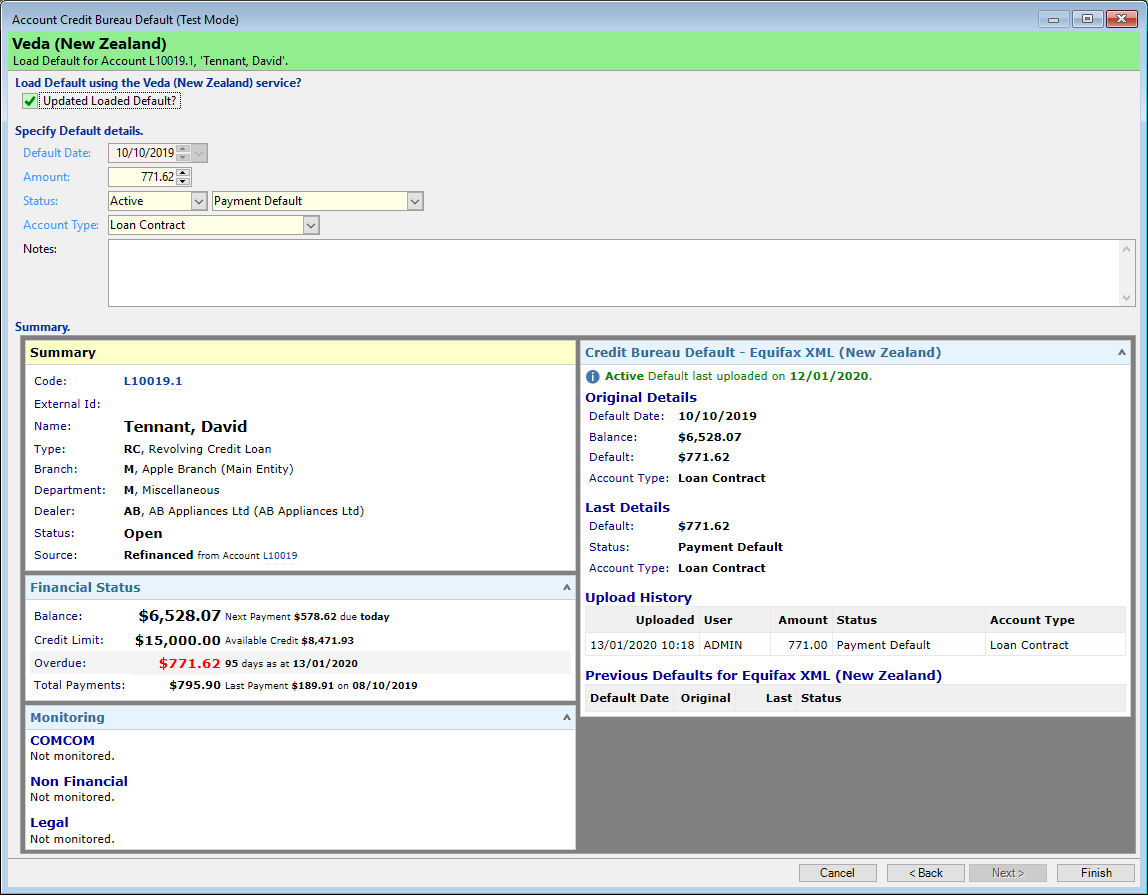
Load Default using the Equifax (New Zealand) service?
Tick the Updated Loaded Default checkbox to allow a user to make changes to be made to the default details.
Specify Default details
- Default Date - The original date of the upload to the Credit Bureau (Default Date).
- Amount - Current overdue balance of the account.
- Status - A user can change the status of the default, e.g. Active to Paying, Active to Overdrawn Account or Active to Bankrupt.
- Account Type - This will default the Account Type based upon the last details uploaded.
- Notes - Enter any relevant notes applicable to the default.
Button Strip
| Icon | Description |
|---|---|
 | Add new or update existing Credit Bureau Default. |
 | Cancel Credit Bureau Default |
 | Show or Hide the Preview Pane below the button strip. |
 | Save the grid selections as your default settings so that the grid will look the same each time the page is opened. |
Suspend
Click the Suspend button to prevent a default being loaded against the Client's Credit History for this particular account.
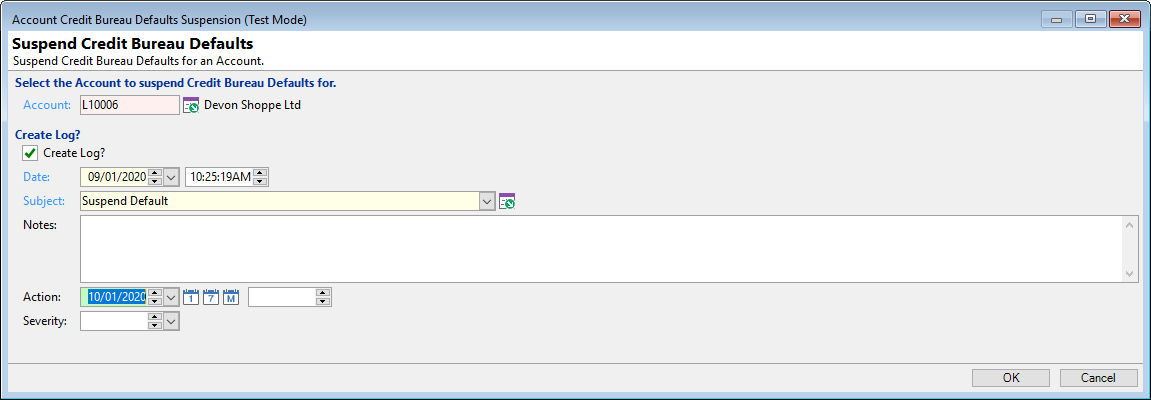
Fill in the appropriate fields and click the  button to complete the wizard.
Update
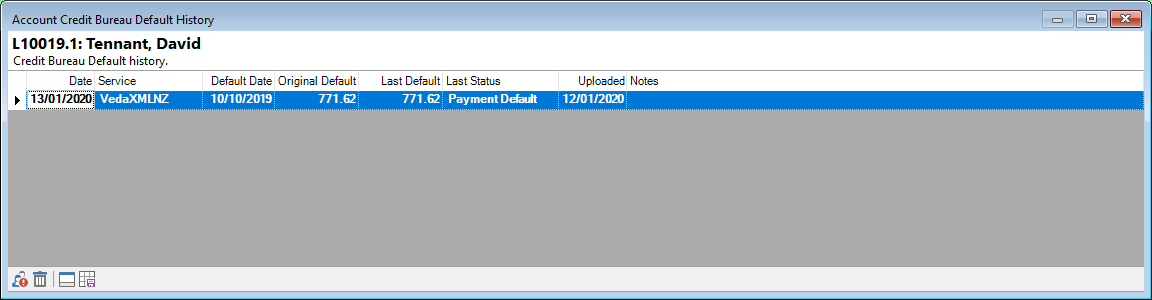
From the Accounts form, Status page, click the Review Credit Defaults button located at the bottom of the page , or the  button in the Credit Bureau Default Summary Page block.
This will display the Account Credit Bureau Default History form from which the button can be clicked to add or update the existing Default record.
Button Strip
| Icon | Description |
|---|---|
| Add new or update existing Credit Bureau Default. |
| Cancel Credit Bureau Default |
| Show or Hide the Preview Pane below the button strip. |
| Save the grid selections as your default settings so that the grid will look the same each time the page is opened. |